Getting started with GitHub — a walkthrough
This page is for you if you are connecting Colleag to GitHub without having worked with GitHub before. It prints well: Ctrl+P → Save as PDF on Windows, and the link can be passed on without a login.
Allow half an hour. You need an e-mail address you can read and administrator rights in Colleag.
Do you need GitHub at all?
Not necessarily. Colleag ships with Colleag.ai Git as the default — we host the storage, you need no account and none of what follows. Choose GitHub when you want to own the storage yourselves, already have a GitHub organisation, or when your IT requires it. It can be changed later. See Where your documents live.
What GitHub is, in a minute
Colleag stores your documents as ordinary text files. Git is a system that keeps track of every change to such files: who changed what, when, and what it looked like before. That is called version control, and it is the same technology software developers have used for fifteen years.
GitHub is an online service that stores such files and their history. A repository ("repo") is a folder with a history. An organisation is the company's account on GitHub, where the repositories live — so they belong to the company rather than to one person's login.
The connection to Colleag goes through a GitHub App. It is not a person and not a password, but an integration with an identity of its own, given access to exactly the repositories you choose — and removable at any time from your own settings.
Step 1 — Create a GitHub account
Go to github.com/signup. Enter an e-mail address, choose a password and a username. GitHub sends a verification code to the address.
Prefer a role address (say it@company.com) over a personal one, so the
account does not disappear when someone leaves.
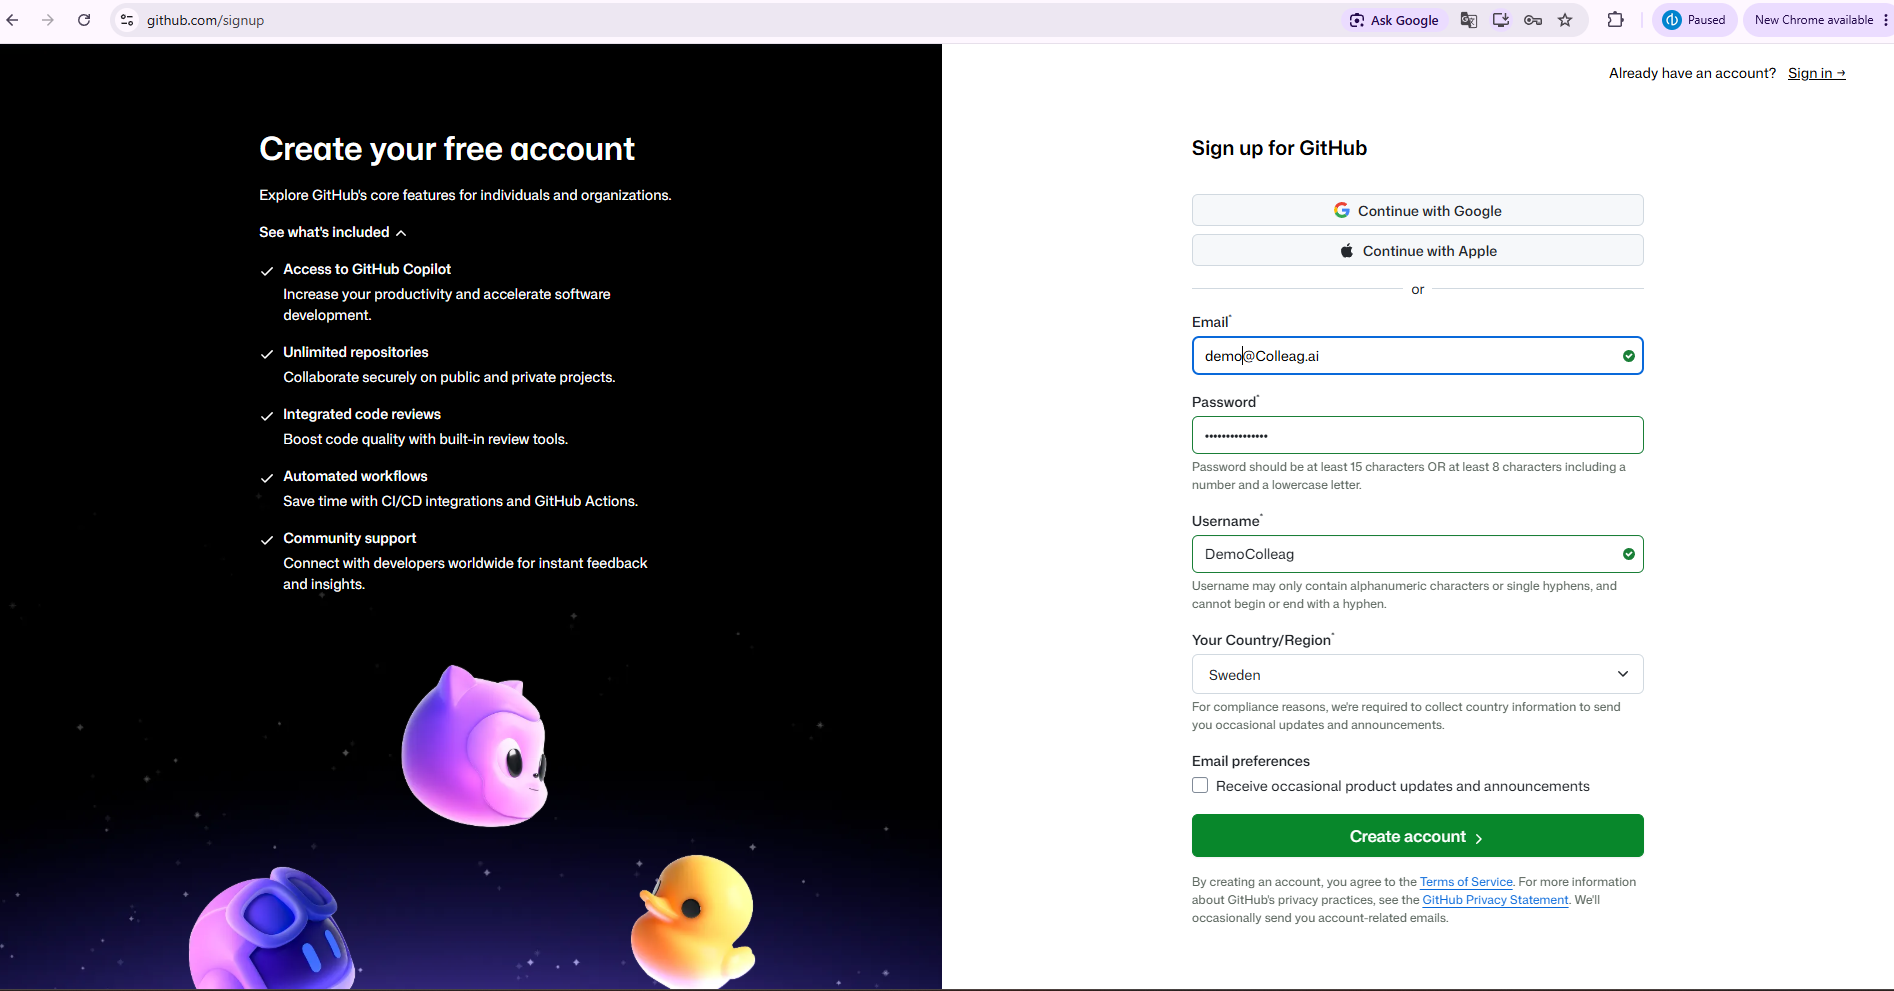
Screenshot 2026-09-29. Fill in the three fields and click Create account.
Step 2 — Create an organisation
Signed in: click your profile picture top right → Your organizations → New organization. Pick the free plan (Free).
Give the organisation a short name without spaces, for example contoso.
Write it down exactly — it goes into Colleag in step 5, and the spelling
has to match letter for letter.
Choose My personal account as the owner and skip inviting members; that can be done later.
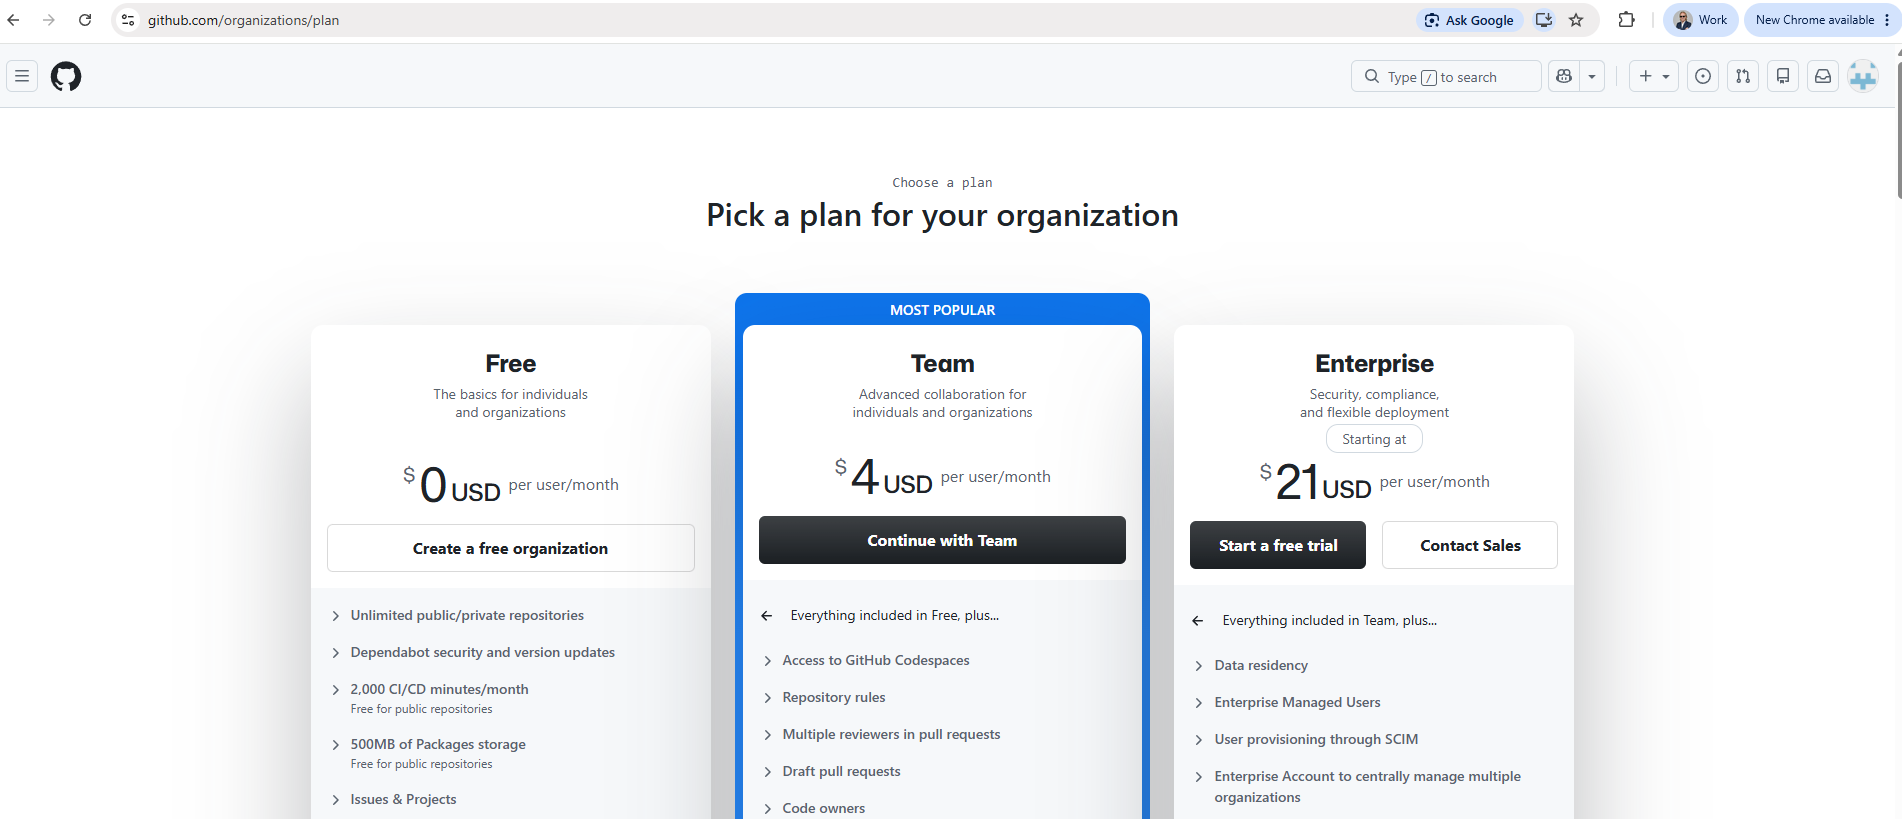
Screenshot 2026-09-29. Click Create a free organization under Free. The next page is called Set up your organization: type the name in Organization name, choose My personal account under This organization belongs to, and click Next. The question about inviting members can be skipped with Skip this step.
Step 3 — Install the Colleag.ai app
Open github.com/apps/colleag-ai.
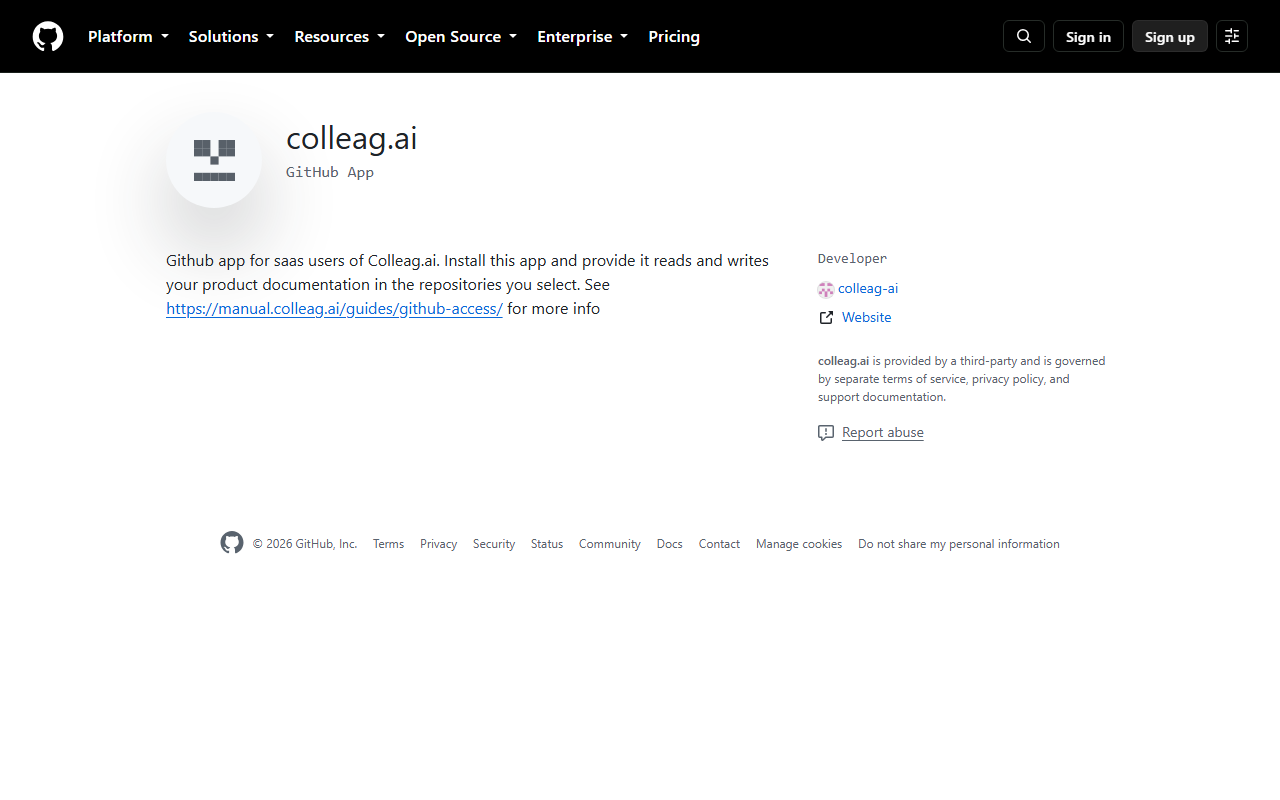
Click Install. GitHub asks where to install it: choose the organisation from step 2, not your personal account.
The next question is which repositories the app may see:
- All repositories — simplest. Colleag creates the repository for you the first time.
- Only select repositories — stricter, and what IT usually prefers. Then
you must create the repositories yourself first in the organisation —
colleagfor product documents andcolleag-compfor company documents, socontoso/colleagandcontoso/colleag-comp— and select them here. Otherwise the connection test in step 5 fails with "repository not found".
Review the permissions — three of them, described in Giving Colleag access to GitHub — and click Install.
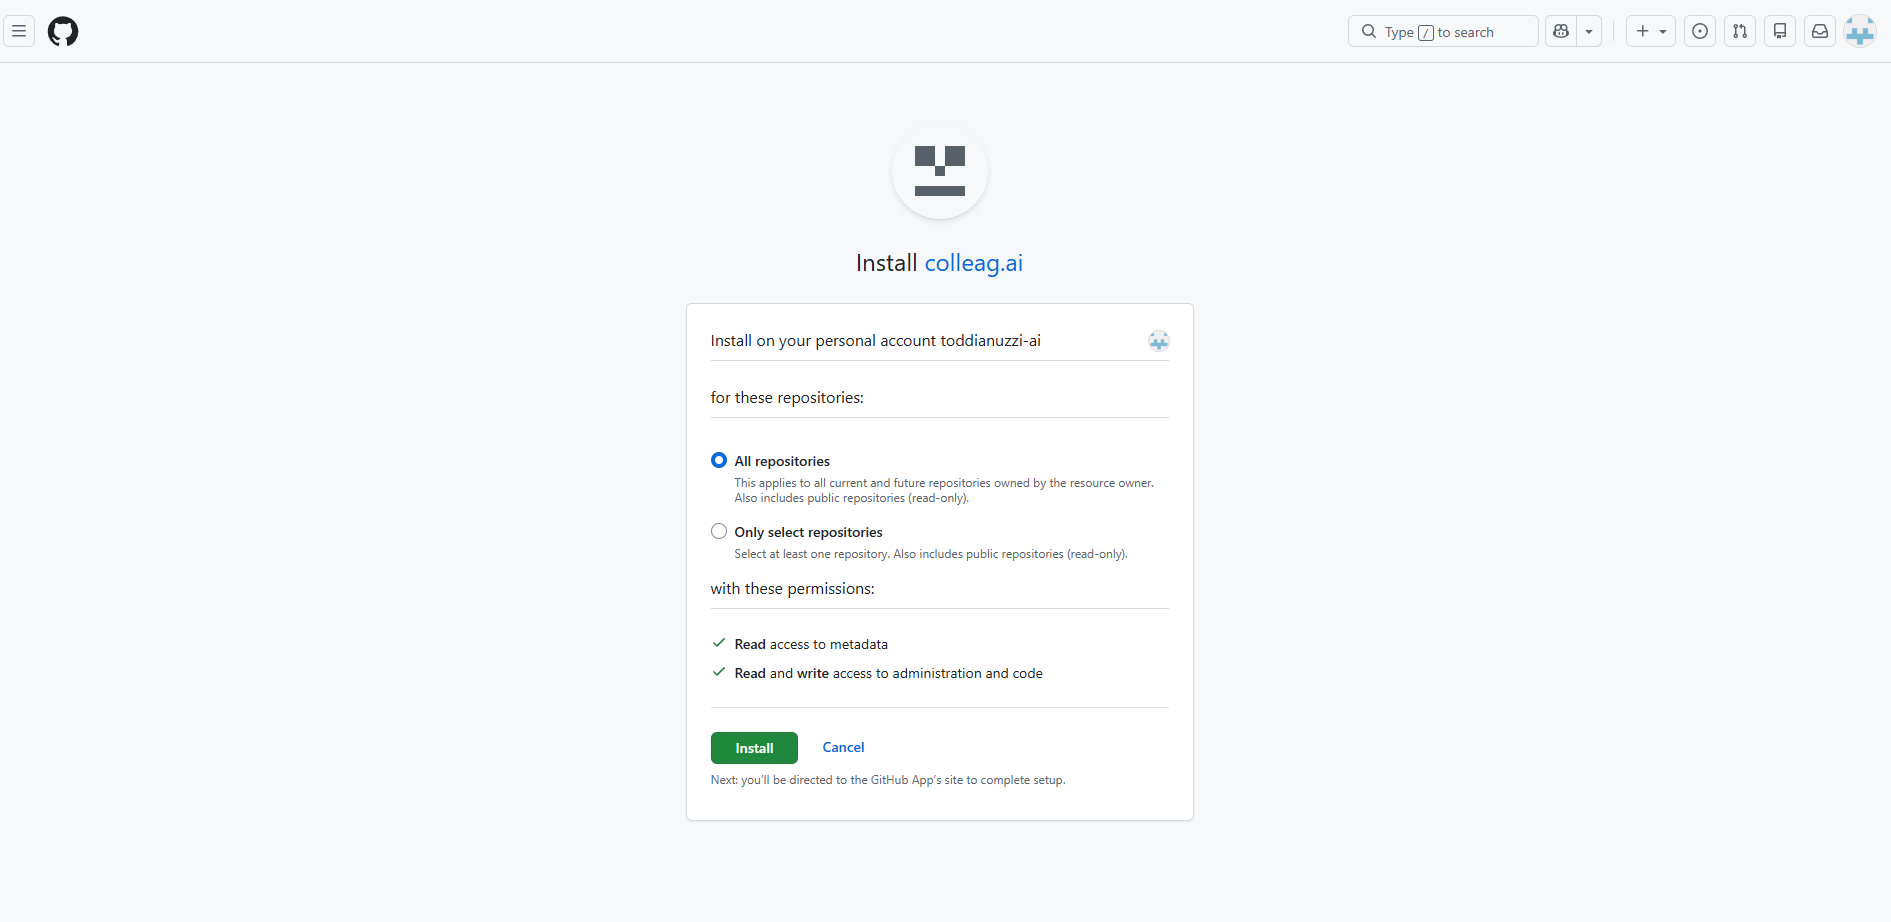
Screenshot 2026-09-29. In the picture the app is being installed on a personal account — which is what you should avoid. If you have several accounts and organisations, GitHub first asks which one; choose the organisation from step 2, and its name appears on the top line instead. The repository choice and the two permission lines are the same.
Step 4 — Find the installation number
When the installation completes, GitHub sends you to a page whose address ends in a long number:
https://github.com/organizations/contoso/settings/installations/12345678
The number at the end — here 12345678 — is the installation ID. Copy
it. That is the number Colleag needs, not the app's "Client ID".
If you lose the page: the organisation → Settings → GitHub Apps → Colleag.ai → Configure, and the number is in the address bar again.
No picture for this step: the number is in the browser's address bar at the
top of the window, last in the address after /installations/. Select it
with the mouse and copy.
Step 5 — Connect in Colleag
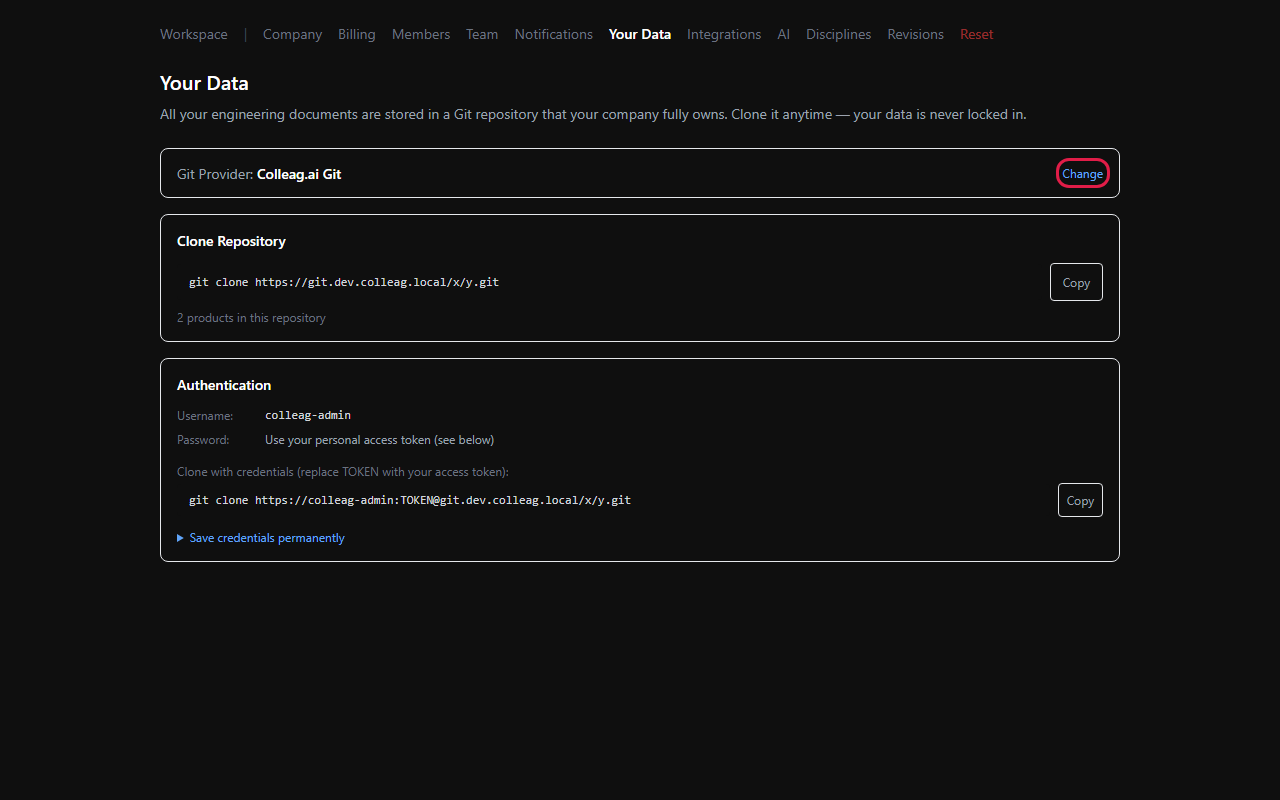
Sign in to Colleag as an administrator and go to Settings → Your Data. It shows which storage is in use right now — the default is Colleag.ai Git. Click Change.
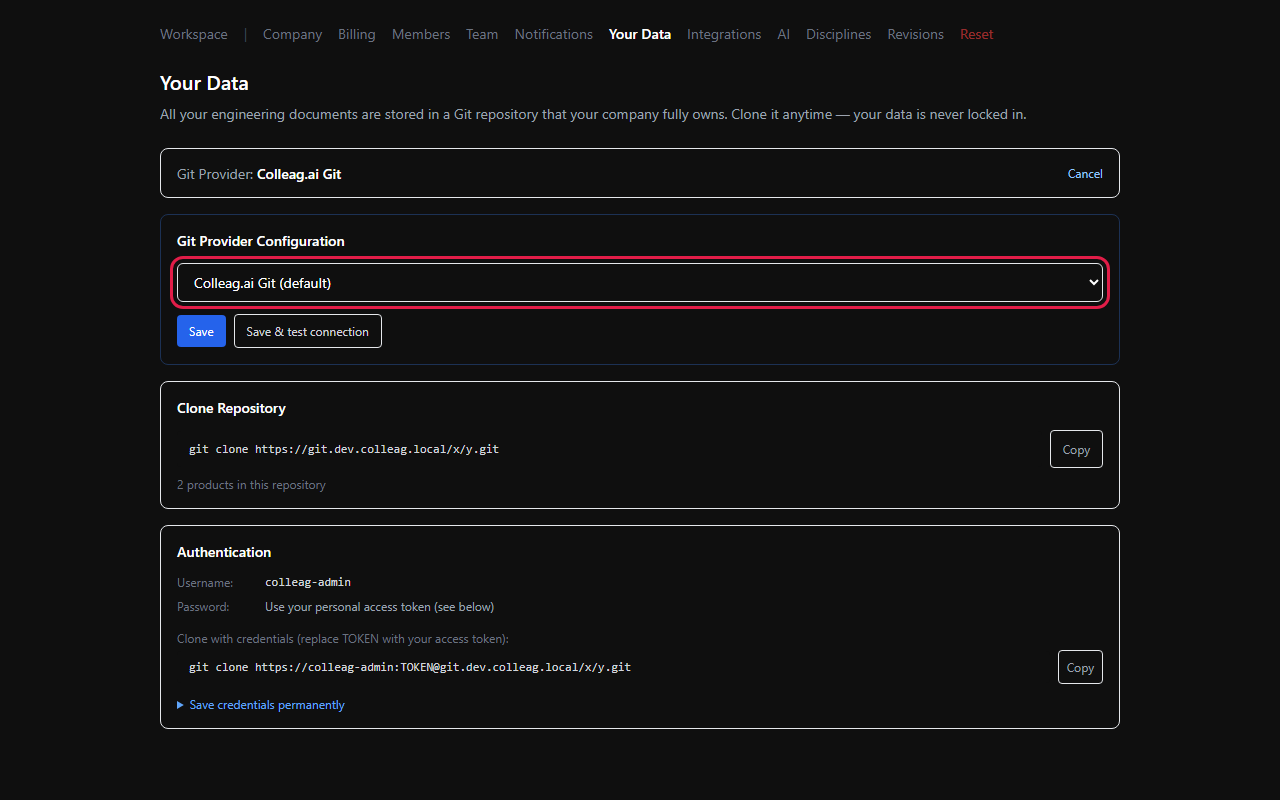
A list appears. Switch from Colleag.ai Git (default) to GitHub.
Fill in:
| Field | What to type |
|---|---|
| Organization / Owner | The organisation name from step 2, exactly as on GitHub, e.g. contoso |
| Repository name | Leave it at colleag, unless you created a repository with another name in step 3. Once a product exists the name is fixed |
| GitHub App Installation ID | The number from step 4 |
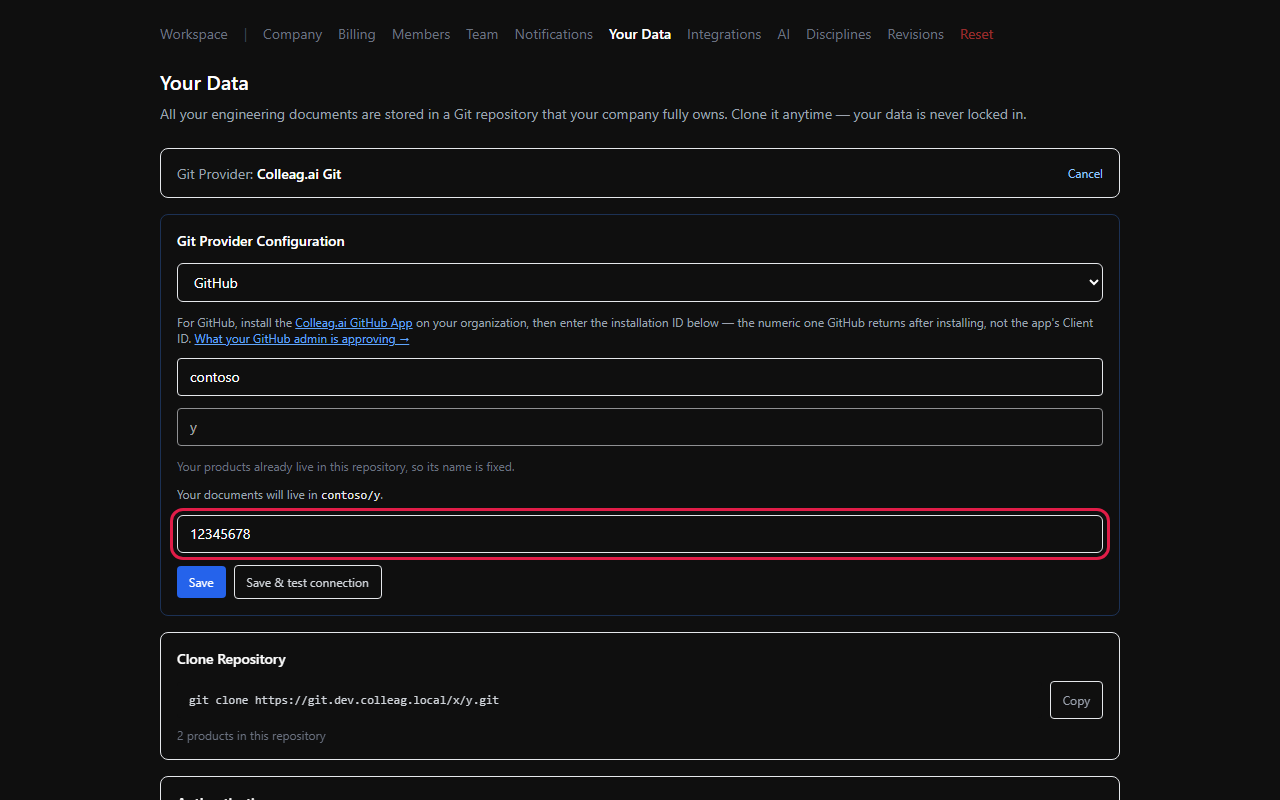
In the picture above the repository name is locked, because the test organisation already has products. On a new organisation you type it.
Click Save & test connection. The result appears under the buttons.
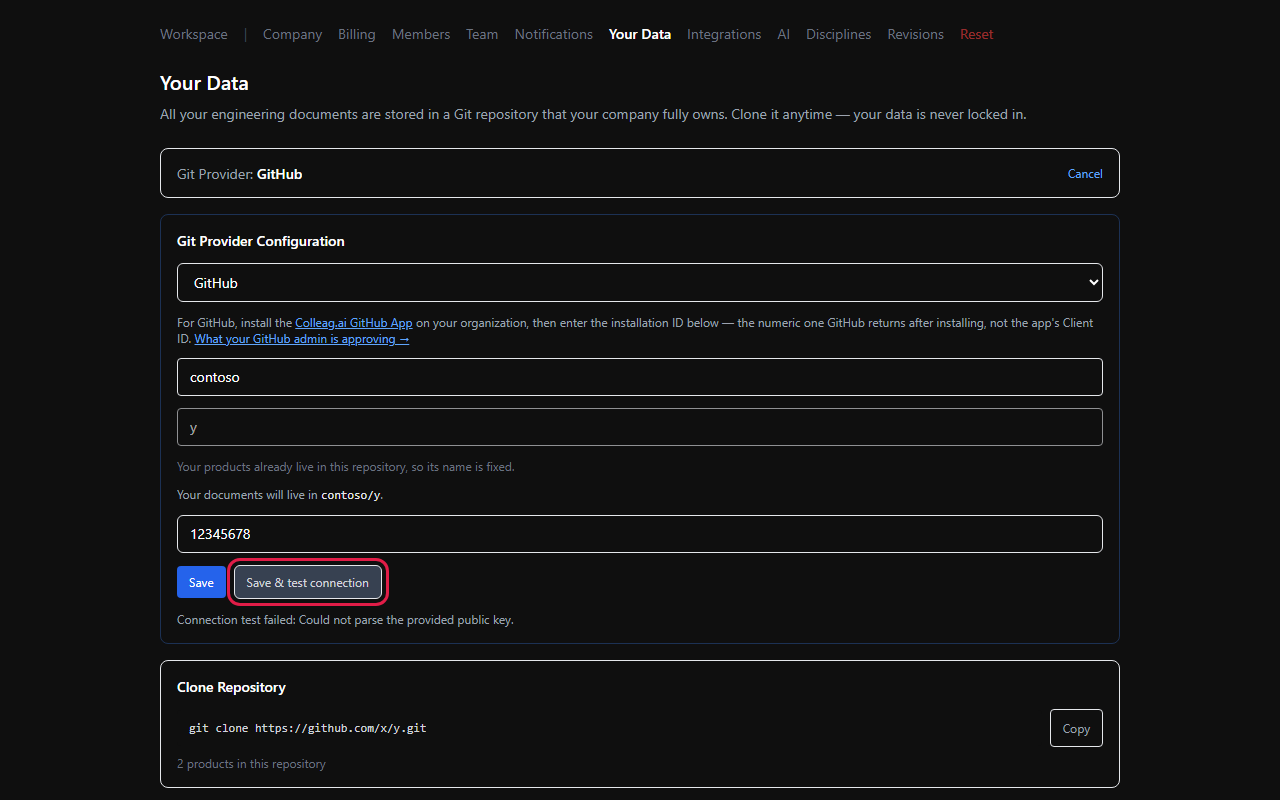
The picture shows a failed test, from a test environment without a real app key — that is what it looks like when something is wrong. A successful test says Connection OK, and the Clone Repository box switches to your GitHub address.
If the test fails
| The message says | Likely cause | Do this |
|---|---|---|
| repository not found | The repository does not exist, or the app was not given access to it | Create colleag and colleag-comp in the organisation, or give the app All repositories |
| installation not found / bad credentials | Wrong installation ID, or the app installed on the personal account | Check step 4; reinstall on the organisation |
| The organisation name in the error is spelled differently | A typo or capital letters | Type it exactly as in GitHub's address bar |
Checklist
- [ ] GitHub account on a role address
- [ ] Organisation created, name written down
- [ ] Colleag.ai app installed on the organisation
- [ ] Installation ID copied from the address bar
- [ ] Organisation and installation ID entered under Settings → Your Data
- [ ] Save & test connection green